Table of Contents
Exploring DHCP Options on Juniper Devices: A Comprehensive Guide
Welcome to our comprehensive guide to exploring DHCP options on Juniper devices!
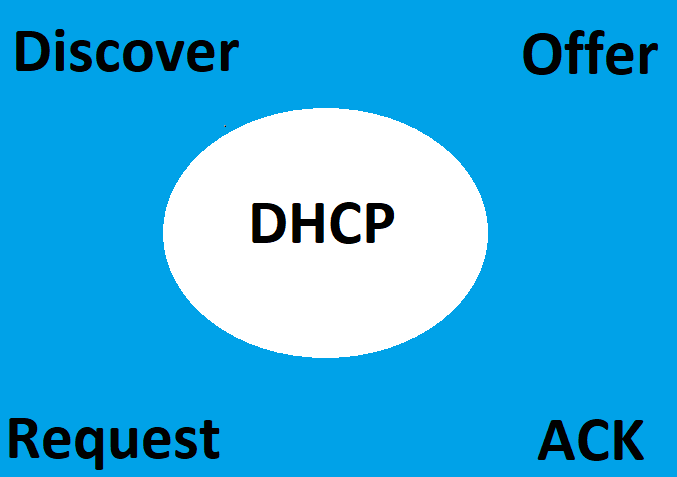
DHCP (Dynamic Host Configuration Protocol) is a network protocol used to assign IP addresses to network devices. It is an essential part of any network, as it allows devices to communicate with each other. Juniper devices are no exception, and they offer a variety of DHCP options to help you configure your network.
In this guide, we’ll take a look at the different DHCP options available on Juniper devices, and how to configure them. We’ll also discuss the benefits of using DHCP on Juniper devices, and how to troubleshoot any issues you may encounter.
First, let’s take a look at the different DHCP options available on Juniper devices. The most common option is the “DHCP Server” option, which allows you to configure a DHCP server on the device. This is useful if you want to assign IP addresses to devices on your network.
The “DHCP Relay” option allows you to forward DHCP requests from one device to another. This is useful if you have multiple devices on your network that need to communicate with each other.
The “DHCP Client” option allows you to configure a device to request an IP address from a DHCP server. This is useful if you want to assign IP addresses to devices on your network without having to manually configure them.
Finally, the “DHCP Pool” option allows you to configure a range of IP addresses that can be assigned to devices on your network. This is useful if you want to assign IP addresses to multiple devices at once.
Now that we’ve taken a look at the different DHCP options available on Juniper devices, let’s discuss the benefits of using DHCP on Juniper devices.
Using DHCP on Juniper devices can help you save time and effort when configuring your network. It can also help you ensure that all devices on your network have the correct IP address, which is essential for communication. Additionally, using DHCP can help you reduce the risk of IP address conflicts, which can cause network issues.
Finally, let’s discuss how to troubleshoot any issues you may encounter when using DHCP on Juniper devices.
If you’re having trouble connecting to the network, make sure that the DHCP server is running and that the DHCP client is configured correctly. Additionally, make sure that the DHCP pool is configured correctly and that the IP addresses are within the correct range.
If you’re still having trouble, try restarting the DHCP server and the DHCP client. If that doesn’t work, try resetting the DHCP pool and reconfiguring it.
We hope this guide has been helpful in exploring DHCP options on Juniper devices. If you have any questions or need further assistance, please don’t hesitate to contact us.
How to Configure DHCP Relay on Juniper Devices
Configuring DHCP relay on Juniper devices is a great way to ensure that your network is properly configured and that your devices are able to communicate with each other. DHCP relay allows you to configure a DHCP server on a different subnet than the one your devices are on, allowing for more flexibility in your network setup.
In this guide, we’ll walk you through the steps of configuring DHCP relay on Juniper devices.
Step 1: Configure the DHCP Server
The first step is to configure the DHCP server. This will involve setting up the IP address, subnet mask, and default gateway for the server. You’ll also need to configure the DHCP options, such as the DNS server, domain name, and other settings.
Step 2: Configure the DHCP Relay Agent
Once the DHCP server is configured, you’ll need to configure the DHCP relay agent. This is the device that will forward DHCP requests from the devices on the different subnet to the DHCP server.
To configure the DHCP relay agent, you’ll need to specify the IP address of the DHCP server, as well as the IP address of the interface that will be used to forward the requests.
Step 3: Configure the DHCP Clients
The next step is to configure the DHCP clients. This involves setting the IP address, subnet mask, and default gateway for each device. You’ll also need to configure the DHCP options, such as the DNS server, domain name, and other settings.
Step 4: Test the Configuration
Once you’ve configured the DHCP server, relay agent, and clients, you’ll need to test the configuration to make sure everything is working properly. To do this, you can use a tool such as ping or traceroute to test the connection between the devices.
Once you’ve verified that everything is working properly, you’re all set! You’ve successfully configured DHCP relay on your Juniper devices.
Troubleshooting DHCP Issues on Juniper Devices
If you’re having trouble with DHCP on your Juniper device, don’t worry! We’ve got you covered. Here are some tips to help you troubleshoot the issue.
1. Check the DHCP server configuration. Make sure that the DHCP server is configured correctly and that the IP address range is correct.
2. Check the DHCP client configuration. Make sure that the DHCP client is configured correctly and that the IP address range is correct.
3. Check the DHCP relay configuration. Make sure that the DHCP relay is configured correctly and that the IP address range is correct.
4. Check the DHCP lease time. Make sure that the DHCP lease time is set correctly and that it is not too short or too long.
5. Check the DHCP bindings. Make sure that the DHCP bindings are configured correctly and that the IP address range is correct.
6. Check the DHCP options. Make sure that the DHCP options are configured correctly and that the IP address range is correct.
7. Check the DHCP logs. Make sure that the DHCP logs are enabled and that they are being updated correctly.
8. Check the DHCP statistics. Make sure that the DHCP statistics are being updated correctly and that the IP address range is correct.
We hope these tips help you troubleshoot your DHCP issues on your Juniper device. If you have any further questions or need additional help, please don’t hesitate to contact us.
Understanding DHCP Snooping on Juniper Devices
DHCP snooping is a security feature that helps protect your network from malicious attacks. It works by monitoring DHCP traffic and verifying that the DHCP messages are coming from a trusted source. This helps to prevent malicious users from spoofing DHCP messages and gaining access to your network.
On Juniper devices, DHCP snooping is enabled by default. It works by monitoring DHCP traffic and verifying that the DHCP messages are coming from a trusted source. The Juniper device will then create a DHCP snooping binding table, which contains information about the IP address, MAC address, and VLAN of each DHCP client.
When a DHCP request is received, the Juniper device will check the DHCP snooping binding table to see if the request is coming from a trusted source. If the request is not coming from a trusted source, the request will be dropped. This helps to protect your network from malicious users who may be trying to spoof DHCP messages and gain access to your network.
In addition to providing protection from malicious users, DHCP snooping can also help to improve network performance. By verifying that DHCP requests are coming from trusted sources, the Juniper device can ensure that only valid DHCP requests are processed. This helps to reduce the amount of unnecessary traffic on your network, which can help to improve network performance.
Overall, DHCP snooping is an important security feature that can help to protect your network from malicious attacks. On Juniper devices, DHCP snooping is enabled by default and can help to improve network performance by reducing the amount of unnecessary traffic on your network.
Best Practices for Securing DHCP on Juniper Devices
Securing DHCP on Juniper devices is an important step in protecting your network from malicious actors. Here are some best practices for securing DHCP on Juniper devices:
1. Use Access Control Lists (ACLs) to limit access to DHCP services. ACLs can be used to restrict access to DHCP services to only authorized users and devices.
2. Use DHCP Snooping to prevent malicious users from spoofing DHCP requests. DHCP Snooping is a feature that verifies the source of DHCP requests and only allows requests from trusted sources.
3. Use DHCP Relay to forward DHCP requests to the appropriate DHCP server. DHCP Relay can be used to forward DHCP requests to the appropriate DHCP server, ensuring that requests are handled by the correct server.
4. Use DHCP Option 82 to identify the source of DHCP requests. Option 82 is a feature that can be used to identify the source of DHCP requests, allowing you to better control access to DHCP services.
5. Use DHCP Rate Limiting to prevent malicious users from flooding the network with DHCP requests. DHCP Rate Limiting is a feature that can be used to limit the number of DHCP requests that can be sent in a given period of time, preventing malicious users from flooding the network with requests.
By following these best practices, you can ensure that your Juniper devices are properly secured against malicious actors.
Check our our Absible post


